Supercharge Your Stories with Substack Video Magic!
Transform your Substack stories into eye-catching video clips.

It’s been weeks since you last wore your jeans jacket. Subsequently, come this fateful morning, as you wore it, you rummaged through your pockets and pulled out a wad of long-forgotten cash.
Exhilarating. Isn’t it?
There’s no question that a lot of us have shared a similar experience in the past.
That's the feeling I had when I rediscovered how to create video clips from my Substack newsletter articles.
Rediscovery?
Yes. Because I’ve used the Substack “Create Video” option a couple of times shortly after starting my newsletters. That was over two years ago. I had thought that Substack had removed that feature since it was hidden under a different icon.
Now, no more hiding for that nifty tool.
Perhaps you’re familiar with it and utilize it, or maybe you’re not aware of it, or it could be something you don’t even realize you’re unaware of — follow my trail.
By creatively adding video clips from your Substack posts to other platforms like TikTok, Vimeo, Instagram, or Facebook Reels, you can extend your stories' reach — bringing more clicks, reads, and hopefully more $$$ to your stories.
Step-by-Step to Creating Video Clips from Your Substack stories
Open the Substack page on your browser.
Open your newsletters dashboard and select the article from which you want to create a video snippet.
Click the menu icon (3 dots to the bottom right-hand side).
Select “Get share images”. (Wait while your page reloads)
Scroll down to the bottom of the page and tap on “Create” to create a Sharable Video.
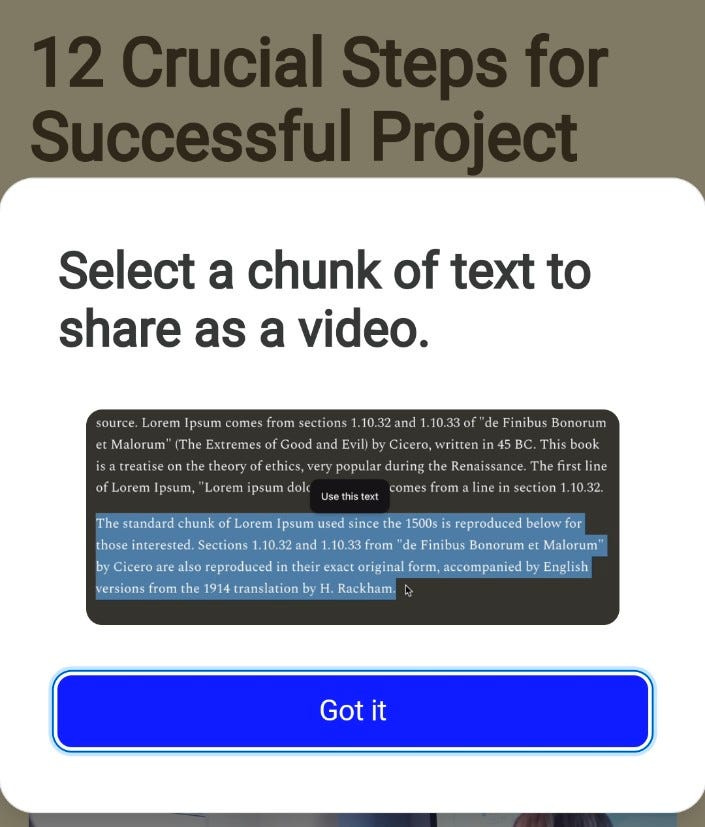
An action box opens. Click on the blue “Got it” button.
Scroll through your article and select the paragraphs you want to turn into a video clip. Hint: You can copy the sections of your story you want to use in the video clip at the end of your story. When you are through with the text-to-voiceover video conversion, you can now delete this text.
After your selection, a black button “Use this” will appear at the base of the selection. Click it.
Scroll down and click on AI Voice (to generate the video clip) or tap on Upload Voice, to record the previously selected section with your voice. If you choose the latter, your previously selected text will appear in a text box for you to read/record to the app. Alternatively, you can prerecord this section with an MP3 Recorder app and then use “Select file” to pick this recorded audio file from your device as the voiceover for your video. If you choose AI Voice, the app reads this selected voice with AI.
Your selected voice is now processed, after which the app displays a “Use this recording” button. Tap on it to continue.
(Progress… ) Wait for the app to process the video.
Select your preferred background for your video clip.
Wait for the app to reprocess your video clip with the selected background. (Depending on your network speed and the file size, this could take several minutes to complete.)
Click the menu button (3 buttons) at the bottom right of the resulting video clip.
Download and rename the video.
You can now use your new video clip on your TikTok, Instagram or Facebook Reels. Remember to add the link to your story when adding story descriptions in TikTok, Instagram, Facebook, and others.
If a picture, as the saying goes, could be worth a thousand words, how much would you rate my YouTube video clip (shown below) of the entire process?
Remember, we are in an era of declining attention spans.
On TikTok, one-minute to one-and-a-half-minute video clips are more effective. Restrict your text-to-video selection to one full screen on your phone — unless you want to tell-it-all on video.
I’m relatively new to TikTok and still experimenting.
Here, here, and here are examples of TikTok clips I created with this Substack tool.
Thanks for reading. Are you a Substacker? Connect with me via Linktree and share your insights.


